WordQ PDF: User Guide for MacOS
Lire le guide de l'utilisateur en français
Getting Started
WordQ PDF is an application within WordQ that allows you to open PDF documents (local, cloud or web) for accessible* reading and writing. In addition to general reading of a PDF document, it is perfect for completing assignments and tests that are provided as PDFs. You can fill in form fields or add your own text boxes; add sticky notes; and mark up text with annotations. All of these can be edited at any time.
All WordQ functions are available to work with a PDF document including:
*Documents that have been scanned must be converted first by OCR
⌘L Left Navigation Panel
- View all pages as thumbnails
- View an outline or table of contents of the document, if it is included;
- View a list of all annotations, highlights, marked text, and added drawing objects
⌘O Open... displays a File Open dialog to choose a PDF document
⌘S Save saves the PDF document
⌘P Print... prints the PDF document
P Pan
- Scroll through a PDF document
- Position the cursor over any annotation for that annotation to be read
- Fill in text form fields with full WordQ support (e.g., word prediction, speech feedback
- Select check boxes and choice buttons in a form
ESC Selection
- Select non-editable text to read
- Fill in text form fields with full WordQ support (e.g., word prediction, speech feedback
- Select check boxes and choice buttons in a form
- Copy and mark up non-editable text (highlight, underline, strikeout)
- Edit an existing annotation
- Modify, style, move, and add an annotation to a drawn object (line, circle, rectangle, etc.)
T Text Box creates a box for you to type with full WordQ support
N Sticky Note creates a sticky note for you to add an annotation with full WordQ support
Fit Page fits the page within the height of the window
Fit Width fits the page across the width of the window
Single Page displays a single page at a time
Facing displays pages side-by-side
⌘ → Rotate Clockwise rotates the page clockwise
⌘ ← Rotate Counterclockwise rotates the page counterclockwise
⌘+ Zoom In increases the page size
⌘- Zoom Out decreases the page size
⌘F Search opens a search box to find words or phrases within the document
Open a PDF document from your local or cloud drive (e.g., iCloud, OneDrive, Google Drive, DropBox, etc.):
- Select Open PDF... from WordQ's Option Menu to open the WordQ PDF application (if not already running).
- An Open dialog will be displayed. Choose the PDF document from your local or cloud drive.
Open a PDF document from the web:
- Click Cancel to close the File Open dialog.
- In a browser, locate the desired PDF document.
- Save the document to your local or cloud drive.
This is necessary as you will not have permission to write over the web document online. - Click on the Open...
button or choose File Open... to open the saved PDF document. Then follow the steps described above.
- Click the Selection
button, if not already selected.
- Using your mouse or touchpad (or other pointing device), drag over the text to be read, then click the Read button in WordQ or use its hotkey.
- Use the SPACEBAR to pause/play reading with word-by-word highlighting.
- After pausing, you may:
- Read individual words by pressing RIGHT or LEFT arrow keys to move within a sentence
- Continue reading by pressing SPACEBAR
- Go to the previous or next sentence by pressing UP or DOWN arrow keys
Adding/Editing Text and Comments
- Click the Text Box
button.
- Position the cursor where you want to type and drag to create a text box (that you can move or resize later).
- Type in the text box with full WordQ support.
- Change the text color and font size, as well as the border and fill color, by first clicking once outside of the text box then clicking within the box to display a Style
pop-up:
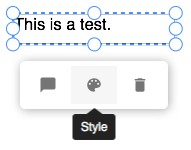
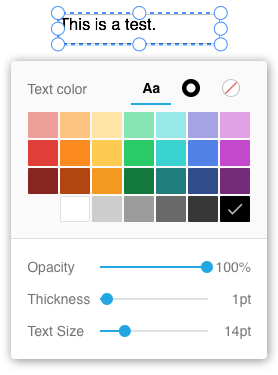
- When done typing, click once outside of the text box and then create another text box (as described above) or choose another mode such as Pan
or Selection
.
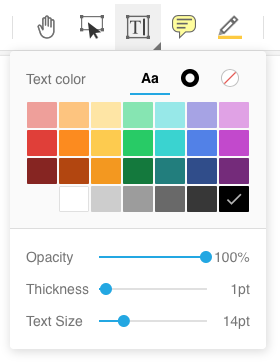
- In advance of creating a text box, change the text color and font size, as well as the border and fill color, by clicking the bottom-right corner of the Text Box
button.
- Click the Sticky Note
button.
- Click in the document at a desired location. The left panel will be displayed to type in a comment with full WordQ support:
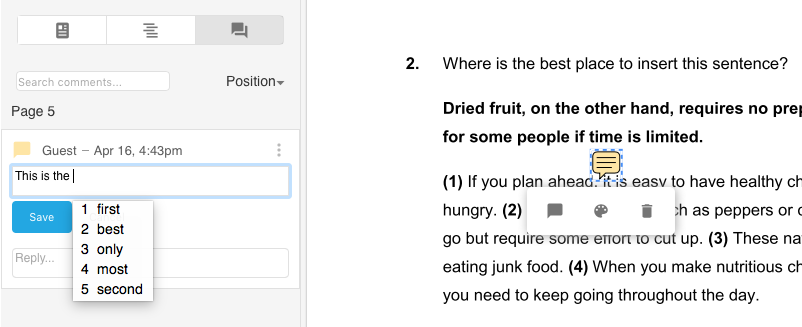
- Within any note, the following standard shortcut keys are available:
- ⌘X Cut
- ⌘C Copy
- ⌘V Paste
- ⌘Z Undo
- After creating a note, the Selection
mode is activated.
- Click the Selection
button.
- Click on any note to edit, move, delete, and color the note in the Selection
mode.
Highlighting and Marking Up a Document
- Click the Highlight
button.
- Before highlighting, you can change the highlight color by clicking the bottom-right corner of the Highlight button.
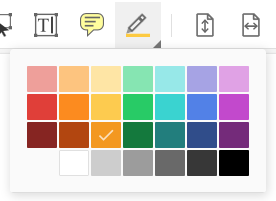
- Drag across the desired text to highlight it.

- Continue to highlight more text until you select another mode such as Pan
or Selection
.
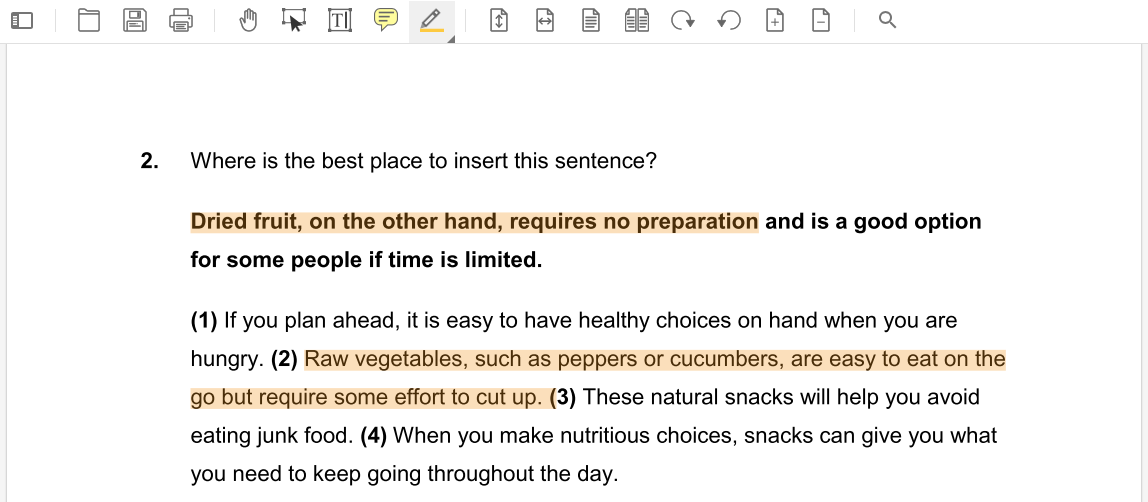
- Add a comment to any highlight by clicking on the highlighted text and choosing the Comment
icon.

- Remove a highlight by clicking on the highlighted text and choosing the Trashcan
icon.
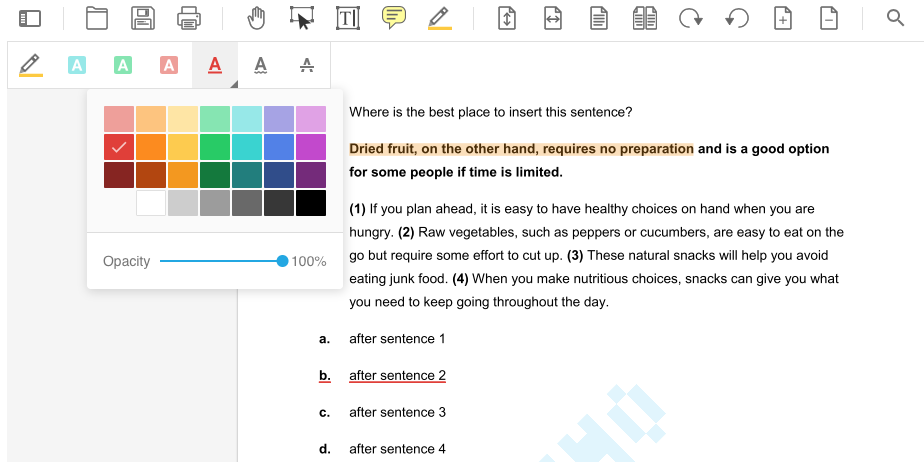
- Additional markup tools are available under the Tools menu that work like the Highlight (H) tool. These include Underline (U)
Strikeout(K) and Squiggly Underline (G). After choosing a tool, drag over the desired text.
- From the Tools : Draw > submenu, choose Line (L), Arrow (A), Oval (O), Rectangle (R) or Ink (F). You can also press one of the shortcut keys (L, A, O, R, or F) at anytime you are not entering text.
- Drag across the document to draw the object.
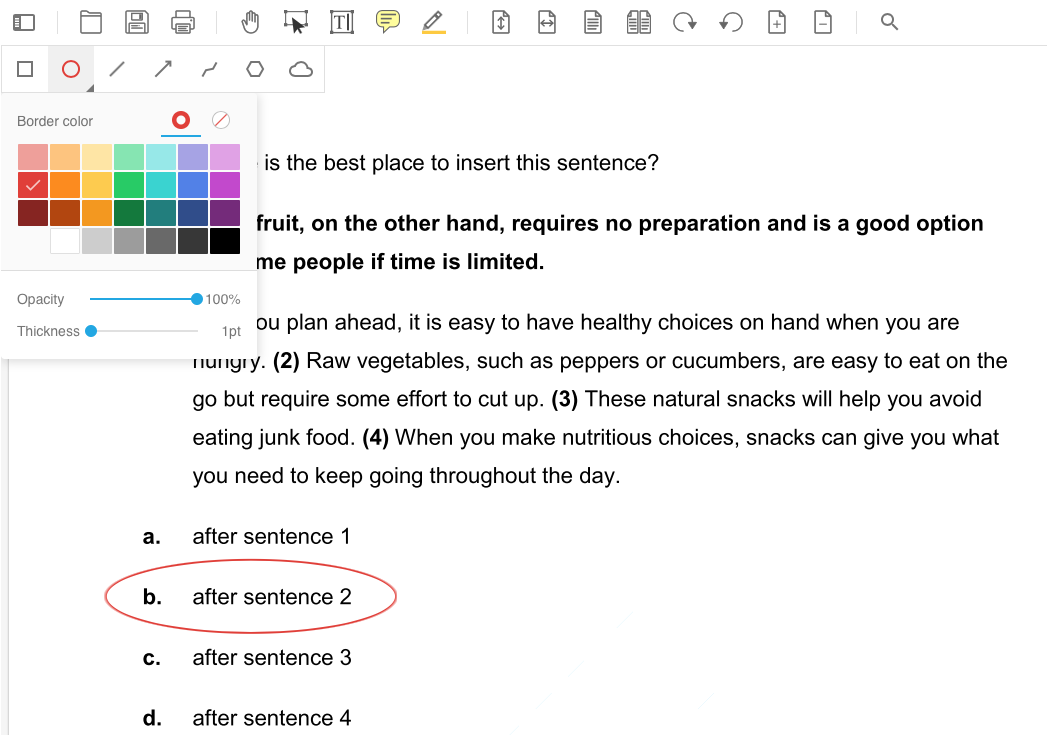
- You can continue to add drawn objects until you select another mode such as Pan
or Selection
.
- In the Selection
mode:
- Add a comment to any drawn object by clicking on it and choosing the Comment
icon
- Remove a drawn object by clicking on it and choosing the Trashcan
icon
- Move or resize a drawn object by clicking on it and then drag it to a new location, or drag one of its corners
- Change the color of a drawn object by clicking on it and then clicking the Style
icon
Viewing and Navigating Pages
- Click on one of the following toolbar buttons or in the View menu to change how a page is displayed:
- Alternately, you can select from the View> Page Display> menu:
- Single Page displays a single page at a time
- Facing displays pages side-by-side
- Facing Continuous displays pages side-by-side with continuous scrolling
- Facing Cover displays pages side-by-side and the document has a cover page
- Facing Continuous Cover displays pages side-by-side with continuous scrolling and the document has a cover page
Fit Page fits the page within the height of the window
Fit Width fits the page across the width of the window
Single Page displays a single page at a time
Facing displays pages side-by-side
Rotate Clockwise rotates the page clockwise
Rotate Counterclockwise rotates the page counterclockwise
- Select from the Navigation menu or use the shortcut keys to jump to:
- Next Page ⌘↓
- Previous Page ⌘↑
- First Page ⇧←
- Last Page ⇧→
- Click the Left Navigation Panel
button to display it on the left-hand side.
- Click the Thumbnail
tab to display all pages as thumbnails. Click on a Thumbnail to jump to that page.
- Click the Contents
tab to display the document's outline or Table of Contents if it is included in the document. Not all documents have an outline or Table of Contents.
- Click the Annotations
to display all annotations, highlights, markups, and added drawing objects in a list. The page number, date and time will be shown for each annotation.
- Click the Left Navigation Panel
button to close the panel.
- Click the Search
button (⌘F) to display the search box.
- Type in a word to search; click on the More Results
icon an view the results. Click on a result to jump to that page.
