
User Guide for Windows
Lire le guide de l'utilisateur en français
PDF Viewer/Editor User Guide
Use WordQ
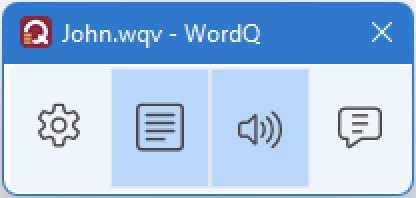 (Visible by default)
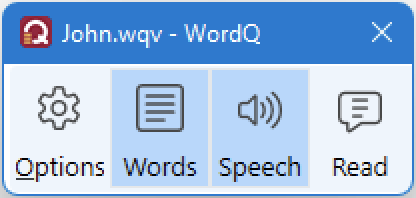 (Labels visible by Options>Preferences...>Show labels on toolbar buttons)
Note: Labels must be visible if the user requires complete keyboard accessibility.
![]()
![]() Options displays a dropdown menu to customize your use of WordQ.
Options displays a dropdown menu to customize your use of WordQ.
![]()
![]() Words: Show or hide the predicted word list. Click or press F9 (or assigned hot key).
Words: Show or hide the predicted word list. Click or press F9 (or assigned hot key).
![]()
![]() Speech: Turn speech feedback On or Off. Click or press F10 (or assigned hot key).
Speech: Turn speech feedback On or Off. Click or press F10 (or assigned hot key).
![]()
![]() Read: Start or stop reading selected text. Click or press F11 (or assigned hot key).
Read: Start or stop reading selected text. Click or press F11 (or assigned hot key).
My Words | Main View/edit your Main user vocabulary | Spelling Review spelling errors | Abbreviations View/edit abbreviation-expansions | Pronunciations View/edit pronunciation exceptions.
Abbreviations. Turn abbreviation-expansions ON/OFF.
Prediction… Customize word predictions.
Speech Feedback… Customize speech feedback.
Hot Keys… Customize hot keys to control the buttonbar.
New User… Create a new user profile from available vocabulary templates.
Open User… Open another user profile.
Save User… Save current user profile.
Save User As… Save current user profile with a different name.
Preferences. Choose advanced settings.
Exam Mode. Limits WordQ features that may not be allowed during exams/assessments for a time-limited period.
Help. View help instructions; view online help videos; check for updates; view End User License Agreement.
Quit. Quits WordQ and saves current user profile.
Step 1: Start WordQ
 Click WordQ desktop icon to run WordQ.
 - Choose and save your own user vocabulary.
- First, select a language and writing vocabulary that you want to use. Click on a vocabulary name to see a description below.
- Second, save your vocabulary. By default, WordQ will save your vocabulary under your Documents : WordQ folder. It is easiest to use you own name when saving.
- The WordQ buttonbar will then appear.
Step 2: Start your writing application
- Start a writing application such as WordPad, MS Word, or Google Docs. The prediction word list will appear at the text cursor.
- Whenever you switch applications, the prediction word list will automatically move to that application.
Step 3: Begin typing and predicting
- Type the first letter of a word. Words will appear in the prediction word list. If the word that you want is in the list, select it by typing the number in front of it, or by pointing and clicking. If your word is not in the list, continue typing until your word appears.
- Note: If you can’t see the prediction word list, ensure the Words
 button is turned on.
- Note: If you can’t see the prediction word list, ensure the Words
- You can hear each word in the prediction box by pressing the DOWN arrowkey or mousing over the words. When listening to the words, you can select them with the ENTER key or by clicking on them with the mouse.
- Note: If you can’t hear the words spoken, ensure the Speech
 button is turned on, and that the speakers are connected and powered on. Also, ensure that the volume is adjusted on both the speakers and in the system settings.
- Note: If you can’t hear the words spoken, ensure the Speech
- As soon as you select a word, it will be entered into your application. It will also be spoken aloud to confirm your selection.
- WordQ will then display words that most likely follow. You don’t have to select words that WordQ suggests. You can type as you would normally and only refer to the word list when you are stuck.
Step 4: Hear your sentence
- After completing your sentence, WordQ will automatically add a space and capitalize the next word for you. The entire sentence will be spoken.
Step 5: Read your sentence
- Select the Read
 button. The sentence will be highlighted. Press the SPACEBAR and it will be spoken, highlighting each word as it is spoken. It will highlight the sentence again. If you hear a mistake, you can easily correct it by using the right arrow key to read one word at a time. Use the LEFT arrow key to go back.
- Press the ESC key or click in the text with your mouse to edit text or resume writing.
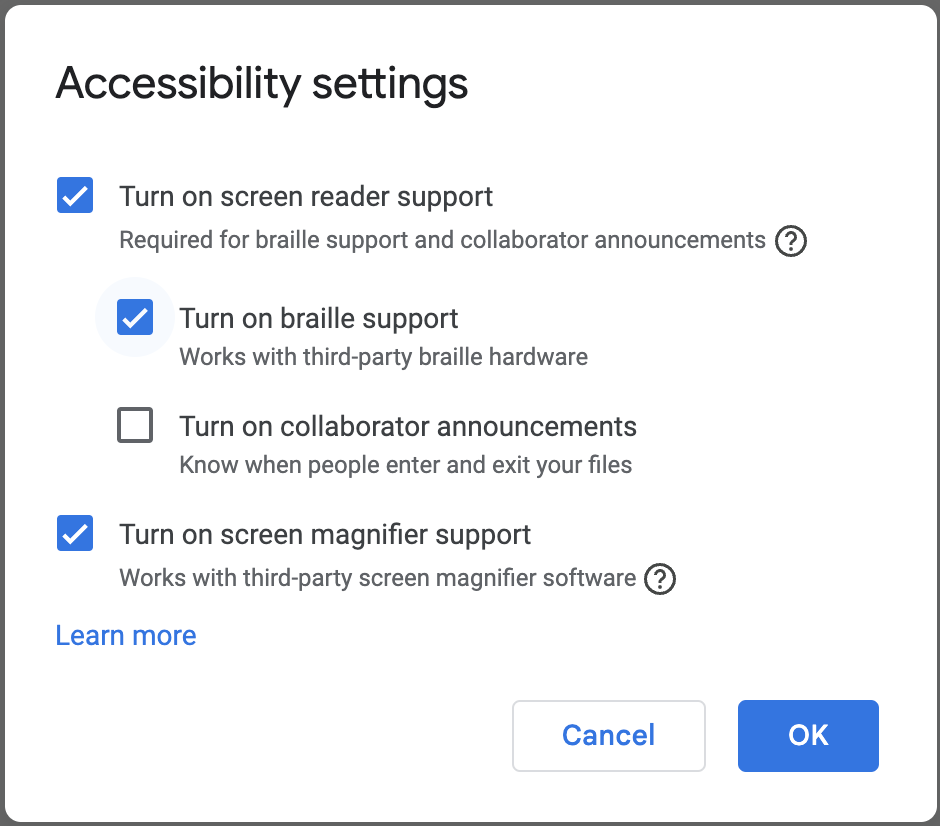
To use WordQ with Google Docs, Slides, and Forms, you must turn on the following settings in Docs: Tools>Accessibility.
If you select the wrong word by mistake, you can quickly correct it by pressing ESC. The last word will be erased and you can now select the correct word.
Sometimes only part of a word you want is predicted, e.g., “start” rather than “starting.”
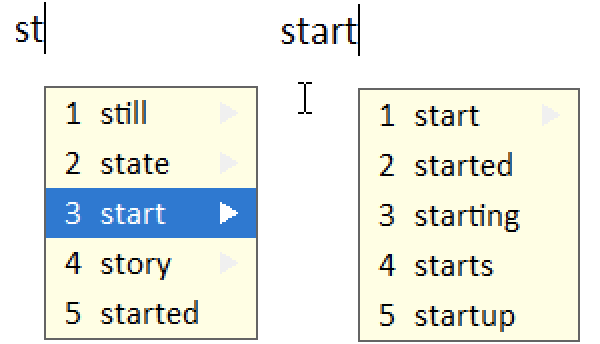
To see different endings or inflections:
- Select a partial word, e.g., “start”
- Press DELETE to backspace.
- Variations of that word with different endings will appear. Make your selection.
To move through the document with the arrow keys:
- Hold down a LEFT, RIGHT or UP arrow key to move through a document without distraction. The word prediction box will temporarily disappear allowing you to also use the DOWN arrow key.
- When you stop, the prediction box will re-appear after a short pause.
Alternately, you can toggle the prediction box On/Off by clicking the Words icon ![]()
![]() (F9) and move while the box is hidden.
(F9) and move while the box is hidden.
Wherever you position the text cursor in your document, WordQ will show you appropriate predictions, even when the cursor is in the middle of a word.
Experiment with moving the cursor through a word to see how the predictions change. This feature is really useful to see different word endings.
If you type a letter within an existing word, the predicted words will be based on the letters that came before, including the one just typed.
Selecting a predicted word will replace the existing word.
Double-click or highlight a word to have it spellchecked.
Speech is turned on by default. Click Speech icon to toggle speech feedback ON ![]() and OFF
and OFF ![]() .
.
Words typed or selected from the prediction list are read out loud.
Each sentence is read out loud at the end of the sentence.
Note: Choose speech feedback cues under Options>Speech Feedback...>Feedback
To help you distinguish predicted words that look or sound similar, WordQ comes with pre-written usage examples for the most commonly confused words.
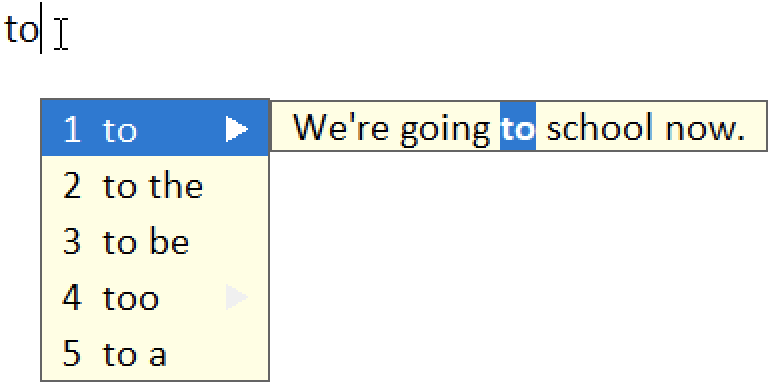
To hear usage examples:
- Step down through the predicted words by pressing the DOWN arrow key or mousing over the words and notice a TRIANGLE symbol to the right of confusing words (e.g., “to” and “too”).
- Use the RIGHT arrow key to display and hear a usage example.
WordQ includes support for synonyms to be added to your vocabulary. However, synonyms are not included by default. They can be added individually, or as an add-on from Quillsoft.
You can look up synonyms for predicted words in a similar manner to usage examples. Words with synonyms are indicated by a DIAMOND symbol to the right of those words.
To view synonyms:
- Use the DOWN arrow key or mouse over predicted words to highlight a predicted word with a DIAMOND symbol.
- Use the RIGHT arrow key or mouse over highlighted predicted word to display its synonyms.
- Use the DOWN arrow key or mouse over synonyms to hear these words. When listening to the words, you can select them with the ENTER key or by clicking on them with the mouse.
- You may choose different word endings as described above.
WordQ will consider creative spelling when making its predictions.
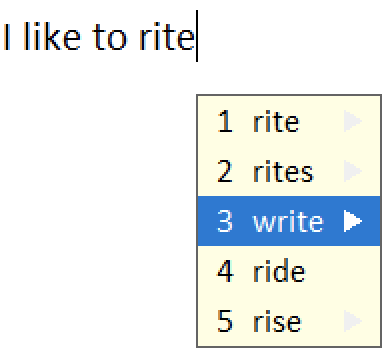
Whenever there are no words in WordQ’s dictionary beginning with the letters that you type, WordQ will suggest words that take into consideration possible spelling/typing mistakes.
Also, when you highlight a word, creative spelling will be considered when predicting words, i.e., spellchecked.
To turn off creative spelling:
- Uncheck Options>Prediction...>Prediction: Predict words based on creative spelling.
A combination of letters, an “abbreviation,” may be defined to represent a word or phrase, e.g., “iwbt” for “I want to book a ticket for ”.
When you type an abbreviation followed by the SPACEBAR, it expands to the assigned word or phrase.
You can create your own set of abbreviations that are easy for you to use and remember. There is no limit on the number of abbreviations that may be saved in one set. (Options
Note: Create your own abbreviation-expansions under Options>My Words...>Abbreviations
![]()
Exam Mode turns off WordQ features that may not be allowed during exams/assessments. In particular, those features that may be deemed unfair or allow “cheating.”
A teacher or exam supervisor typically initiates this mode and chooses the time limit.
Prior to starting Exam Mode it is important that the user loads their personal vocabulary and configures their desired usability features, such as Voice, Word List display, and Selection settings.
After choosing Exam Mode, a warning dialog will be displayed indicating the following features are turned off and not available:
- Options menu
- Abbreviation-expansions
- Pronunciation exceptions
- Synonyms
- Word List following the cursor (Note: the Word list must be manually positioned)
- Predictive phrases
- Next word prediction
Two features to allow are optional:
- Word usage examples (Default = OFF)
- Single words added by the user, including Topic words (Default = ON)
Choosing the Exam Mode time limit:
- Using the up and down arrow buttons, choose the time limit between 1 and 12 hrs.
- After clicking OK, it is not possible to turn Exam Mode off until the time limit has been reached or the computer is re-started (not logging off/on).
- After the time limit has been reached, the Exam Mode will be cancelled the next time the WordQ is run.
WordQ PDF is an application within WordQ that allows you to open PDF documents (local, cloud or web) for accessible* reading and writing. In addition to general reading of a PDF document, it is perfect for completing assignments and tests that are provided as PDFs. You can fill in form fields or add your own text boxes; add sticky notes; and mark up text with annotations. All of these can be edited at any time.
All WordQ functions are available to work with a PDF document including:
*Documents that have been scanned must be converted first by OCR
Complete instructions are available in PDF Viewer/Editor User Guide
Open a PDF document from your local or cloud drive:
- Select Open PDF... from WordQ's Option Menu to open WordQ PDF application (if not already running).
- An Open dialog will be displayed. Chose the PDF dcument from your local or cloud drive.
- The Pan
 button will be initially selected. In Pan mode, you can:
- Pan or scroll through the document
- Fill in text form fields with full WordQ support (e.g., word prediction, speech feedback)
- Select check boxes and choice buttons in a form
- Position the cursor over any annotation (note, arrows, lines, etc.) for that annotation to appear and be read automatically.
Move the cursor away to hide the annotation
Open a PDF document from the web:
- Click Cancel to close the File Open dialog.
- In a browser, locate the desired PDF document.
- Save the document to your local or cloud drive.
This is necessary as you will not have permission to write over the web document online. - Click on the Open...
 button or choose File>Open... to open the saved PDF document. Then follow steps steps described above.
Read Text
WordQ speaks back letters, words, and sentences as you type. Plus, word predictions and menus can be spoken. Choose these speaking cues under Options>Speech Feedback...>Feedback. Any combination of these may be used:
- Speak letters helps you hear, when not paying attention to the screen, whether you typed the correct letter.
- Speak words helps you hear whether you made the right selection. It also helps you hear spelling mistakes as a word generally won’t sound right if you make a mistake. If vowels are left out, the word will be spoken letter-by-letter. This complements underlining errors done by some word processors.
- Speak sentences helps you immediately hear how words flow in a sentence to hear whether you made some mistake(s). Also, if you never hear a sentence spoken, that is a cue that you have forgotten to use an ending punctuation.
- Word predictions can be spoken by pressing the DOWN arrow or pointing with the mouse.
- Menus, including pop-up contextual menus can be optionally spoken.

To read a block of text:
- Highlight the block of text to read.
- Click Read button .
- The text is read immediately. Each word is highlighted as it is spoken.
- To stop reading at any time, click Read Read button
 , press the ESC key, or click the mouse button.
Proofreading sentences uses both visual and spoken cues to help you find mistakes in word order, word form, missing words, grammar, spelling and punctuation. By listening to the flow of words you can hear whether it makes sense. You can often hear mistakes that you don’t see.
If you hear a mistake you can then step through the sentence word-by-word to locate the mistake. For example, you may hear two words that sound wrong together. You may have left a word out in between or one of the words may be incorrect.
In some applications, word-by-word highlighting is not always available and you must manually highlight the text as described above (Block of text). If word-by-word highlighting is desired in these situations, you can easily copy and paste the text into WordPad for proofreading.
To proofread a sentence:
- Position the text cursor anywhere in the sentence.
- Click Read .
- The sentence will be highlighted and the prediction box will temporarily disappear. The keyboard is disabled except for SPACEBAR, ESC, and the ARROW keys.
- Press SPACEBAR to begin reading the sentence. Each word is highlighted as it is spoken. Listen for any mistakes. Press SPACEBAR to pause/resume reading.
- The sentence is highlighted again after it has been read.
You may then:
- Read individual words to locate specific errors by repeatedly pressing RIGHT or LEFT arrow keys to move within a sentence.
- Press the ESC key or click in the text with your mouse to resume writing and make corrections
- Read the sentence again by pressing SPACEBAR
- Go to the previous or next sentence by pressing UP or DOWN arrow keys.
Type your text as best as you can. Don’t worry about punctuation for the moment. When you’ve finished typing a section, use proofreading as described before to have WordQ read your text back to you.
If you’re not sure about punctuation, experiment. Put in a comma or a question mark where you think it might go.
Listen to the sentence(s) being read back. The speech will automatically pause at each punctuation mark and the intonation will change. Make changes until you are satisfied with how it sounds.
The Read function may not always work with more complex formatting, such as some tables.
It may also be unable to read unusual characters. Such problem are most common when trying to read websites.
The document that you are reading must be the active application for text to be read. Do not click WordQ titlebar before clicking Read.
Personalize Vocabulary
Select My Words...>Main from the Options menu. The My Words dialog will be displayed.

You can add personal words or phrases to your WordQ vocabulary such as the names of family and friends. While WordQ includes many common names, adding your own names helps WordQ identify ones that are important to you.
You can also choose to add your words as you type. WordQ will automatically learn correctly spelled words.
To add a word or a phrase:
- Type a word or short phrase (up to 50 characters; no numbers) in the New word box and then click Add.
- You may add any number of words that you want. Be careful with your spelling, as words are not checked for spelling at this time.
- If the word is already in the list, it will be highlighted for you.
- Select OK to accept your words.
To add words as you type:
- Select Prediction...>Prediction from the Options menu. Ensure that the following option is set: Predict new words that I use
- New vocabulary words will automatically be added to your vocabulary as you type if they are correctly spelled. Misspelled words and unrecognized words will be put aside for you to review later.
To add a Usage Example:
- Select a vocabulary word, ensure that the Usage Example option is chosen, and then type in a usage example in the box below the vocabulary list and click Apply when done.
- More than one usage example may be entered separated by a period (.)
- Usage examples may be written in any language.
To add a Synonym(s):
- Select a vocabulary word, ensure that the Synonyms option is chosen, and then type one or more synonyms, each separated by a comma, in in the box below the vocabulary list and click Apply when done.
- Note that synonyms are indicated by a diamond symbol beside the word in the prediction list and can be selected as an alternative to the predicted word.
- Synonyms may be written in any language.
- Synonyms may also be imported from a .csv file.
To share your vocabulary:
- Choose Export .csv to export your vocabulary in a comma-separated file format. This file may be shared with another user.
- Choose Import .csv to import a vocabulary that has been saved using the Export .csv function (only).
Select My Words...>Spelling from the Options menu.
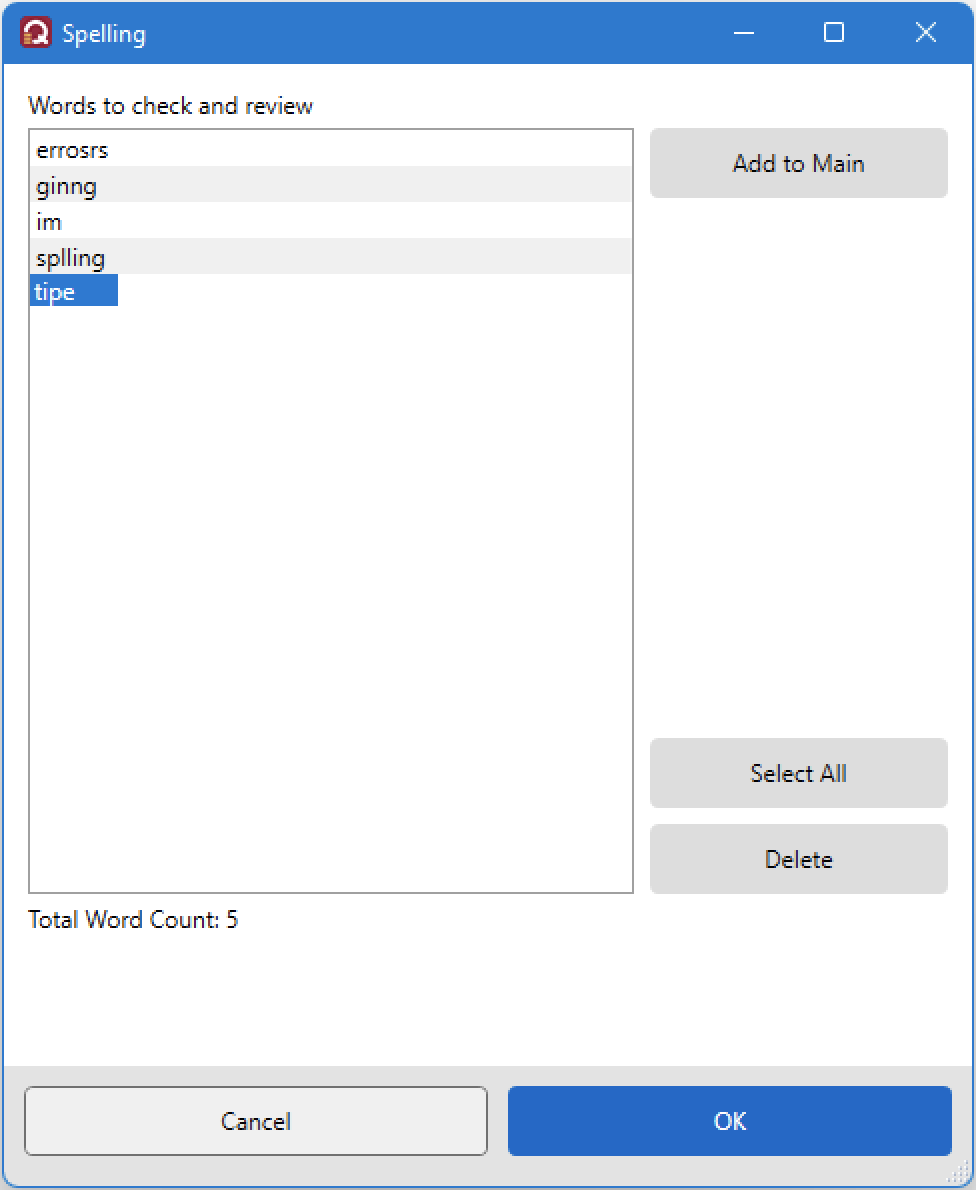
Misspelled and unrecognized words are shown here for you to review.
To accept words for prediction:
- Select individual words by clicking on them. Select a range of words with the common SHIFT+click action. Select separate words with CTRL+click.
- Click Add to Main to add selected words to your main list of words. The words will now be used in word prediction.
- Click OK when done.
To delete misspelled words:
- Select individual words by clicking on them. Select a range of words with the common SHIFT+click action. Select all words with CTRL+A.
- Click Delete to remove selected words from the list.
- Click OK when done.
Note: Leaving words in the spelling list does not affect word prediction. You may accept or delete words at any time.
Select My Words...>Abbreviations from the Options menu.
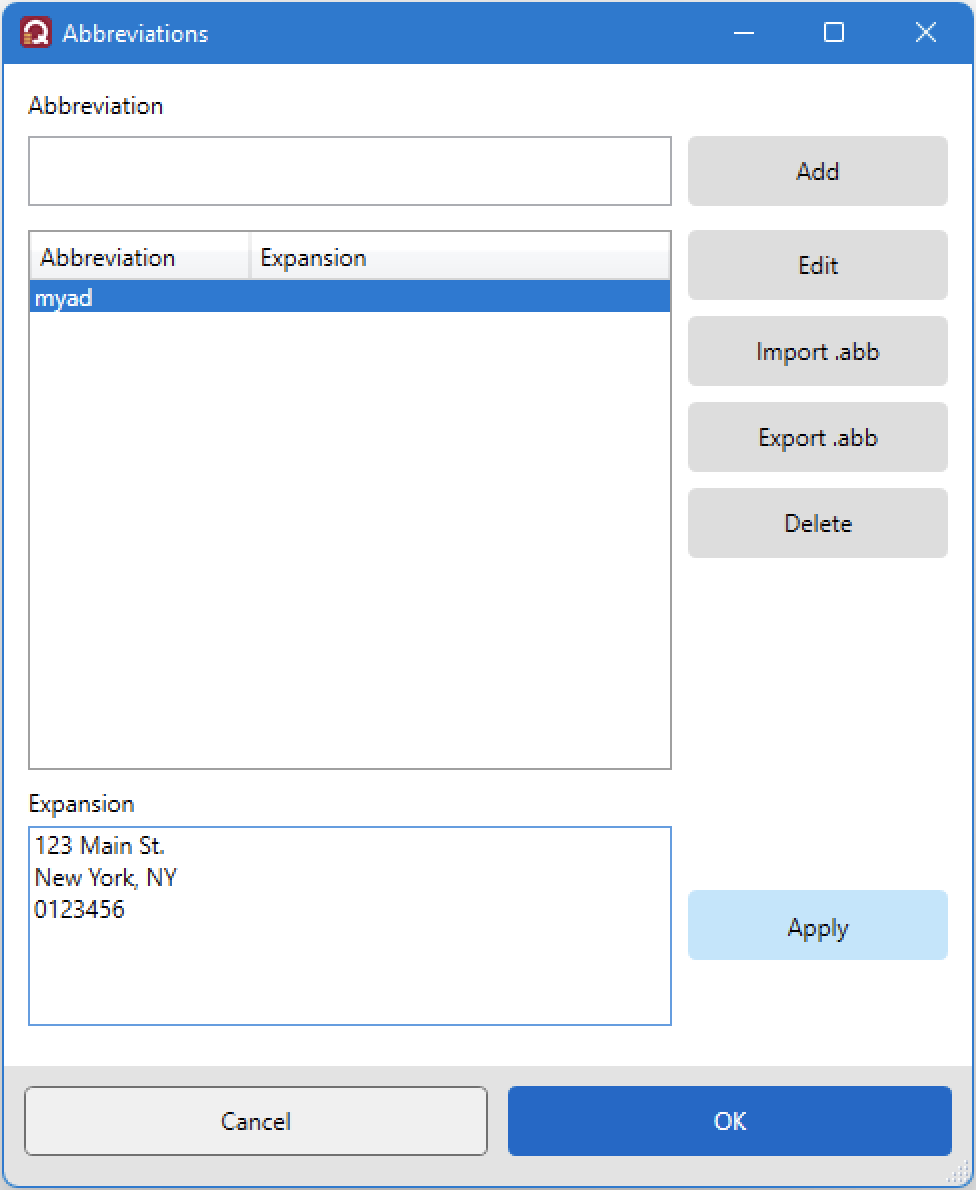
To add an abbreviation-expansions:
- Type in an abbreviation in the Abbreviation box using only letters and click Add.
- The abbreviation will be entered in the list of abbreviations in alphabetical order.
- Type the expanded text in the Expansion box and click Apply.
- Repeat for all abbreviation-expansions.
- Click OK when done.
To share your abbreviation-expansions:
- Choose Export .abb to export your abbreviation-expansions to share with another user.
- Choose Import .abb to import abbreviation-expansions that has been saved using the Export .abb function (only).
Personalize Prediction Options
Select Prediction...>Prediction from the Options menu.
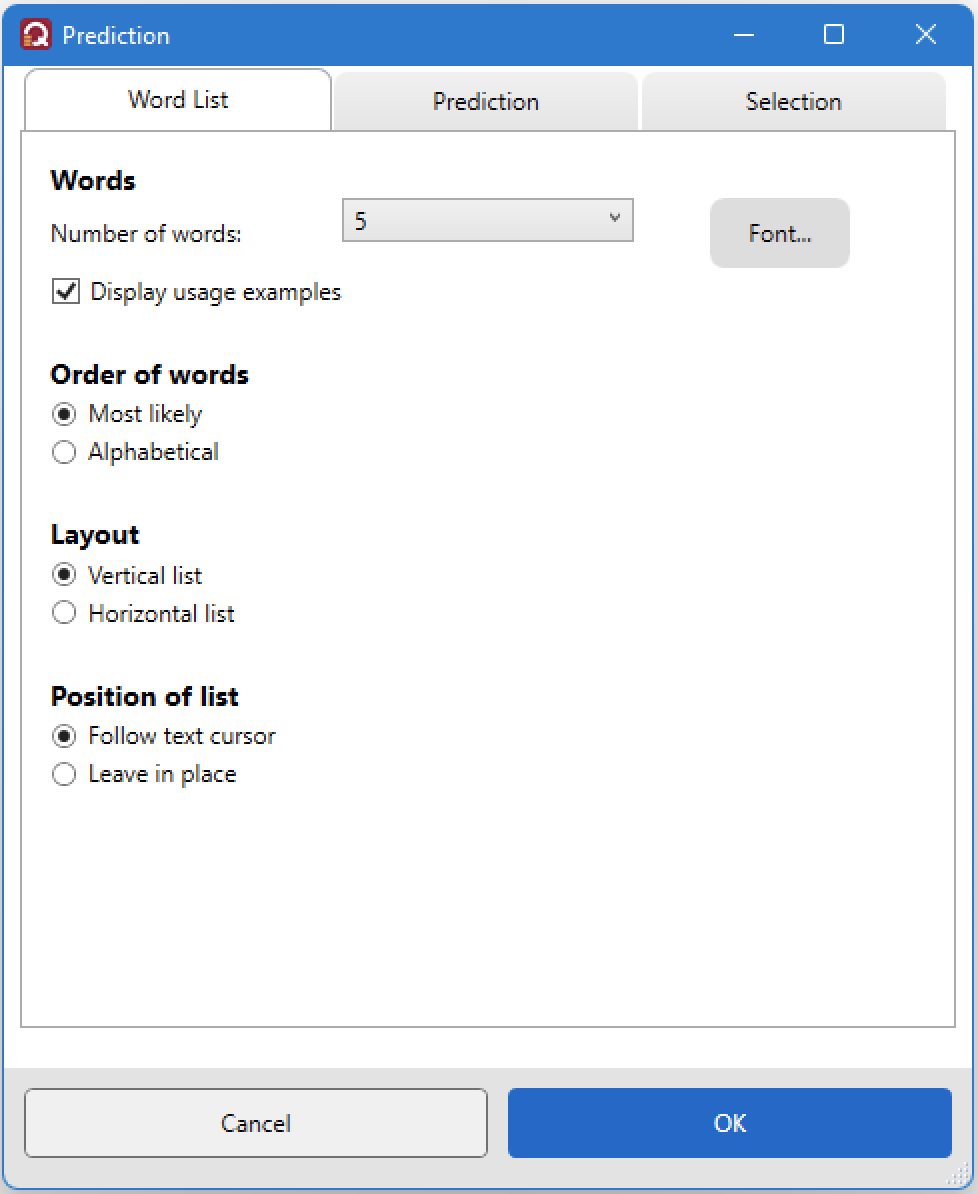
Words
Number of words. Choose the number of words (1 – 9). (Default = 5)
Font. Select the Font button and choose the font, style and size. The prediction box automatically changes size with any font changes.
Display synonyms turns the display of synonyms On/Off. (Default = ON)
Display usage examples turns the display of usage examples On/Off. (Default = ON)
Order of predicted words
Most likely shows predicted words in most likely order. (Default)
Alphabetical shows predicted words in alphabetical order.
Layout
Vertical list displays predicted words vertically, which is generally easier to read. (Default)
Horizontal list displays predicted words in a single row.
Position of List
Follow text cursor displays predicted words following the text insertion cursor as you type. (Default)
Leave in place displays predicted words at a fixed location as you type. You can drag the list to another location using the title bar that is shown only when this option is selected.
Select Prediction...>Predictions from the Options menu.
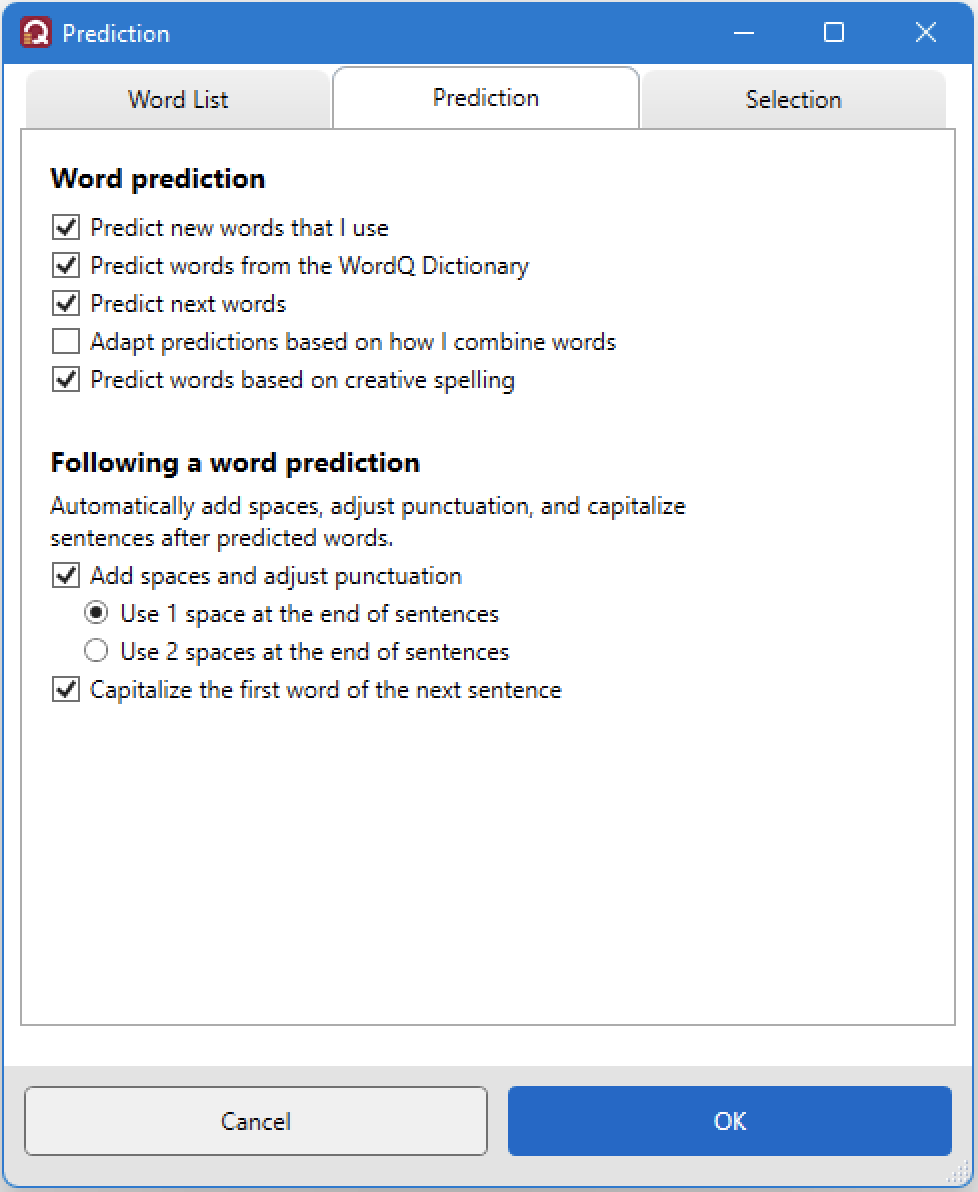
Word prediction
Predict new words that I use enables WordQ to automatically add correctly spelled words to your vocabulary. Novel and misspelled words are put aside for you to review. See Review misspelled or unrecognized words above. (Default = ON)
Predict words from the WordQ Dictionary suggests words from the WordQ Dictionary when appropriate words cannot be found in your vocabulary. (Default = ON)
Predict next words displays the words that are most likely to follow the word you have just selected. (Default = ON)
Adapt predictions based on how I combine words enables WordQ to learn which words you use to follow one another. If you have trouble with grammar, you may want to leave this option unchecked. (Default = OFF)
Predict words based on creative spelling enables WordQ to consider creative spelling when making its predictions. Whenever there are no words in WordQ’s dictionary beginning with the letters that you type, WordQ will suggest words that take into consideration possible spelling/typing mistakes. Also, when you highlight a word, creative spelling will be considered when predicting words, i.e., spell checked. (Default = ON)
Following a word prediction
Add spaces and adjust punctuation. You can choose to let WordQ automatically add a space after you select a predicted word. When you type a punctuation mark, WordQ will remove this training space, place the punctuation and add any necessary spaces. (Default = ON)
You may also choose to:
- Add 1 space after you end a sentence. This is the common rule with computer fonts. (Default)
- Add 2 spaces after you end a sentence.
Capitalize the first word of the next sentence. This option is only available when the previous option is selected, and only works if you immediately begin typing the next sentence after typing an end-of-sentence mark. (Default = ON)
To keep your vocabulary from learning new words:
- Uncheck Predict new words that I use
- Uncheck Adapt predictions based on how I combine words
To predict words from only your vocabulary:
- Uncheck Predict words from the WordQ Dictionary
Select Prediction...>Selection from the Options menu.
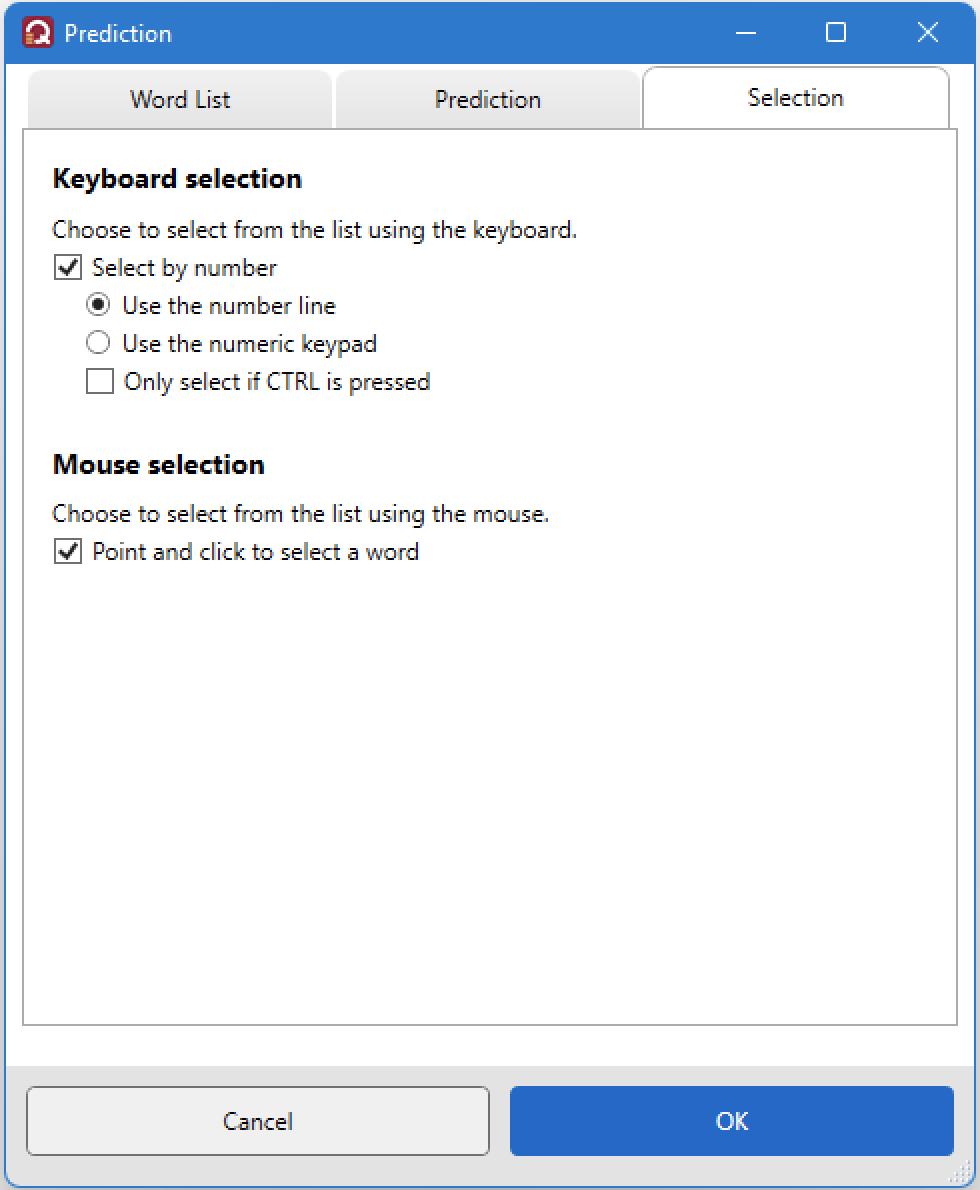
Keyboard selection (Default = ON)
Select by number enables selection of predicted words by either the number line or numeric keyboard. (Default = ON)
- Use the number line uses the numbers above the letters to select predicted words. (Default)
- Use the numeric keyboard uses the numbers on a numeric keypad (on extended keyboard) to select predicted words.
Mouse selection (On by default)
- Point and click to select a word enables selection of predicted words by a mouse/trackpad. (Default = ON)
Personalize Speech Feedback
Select Speech Feedback....>Voice from the Options menu.
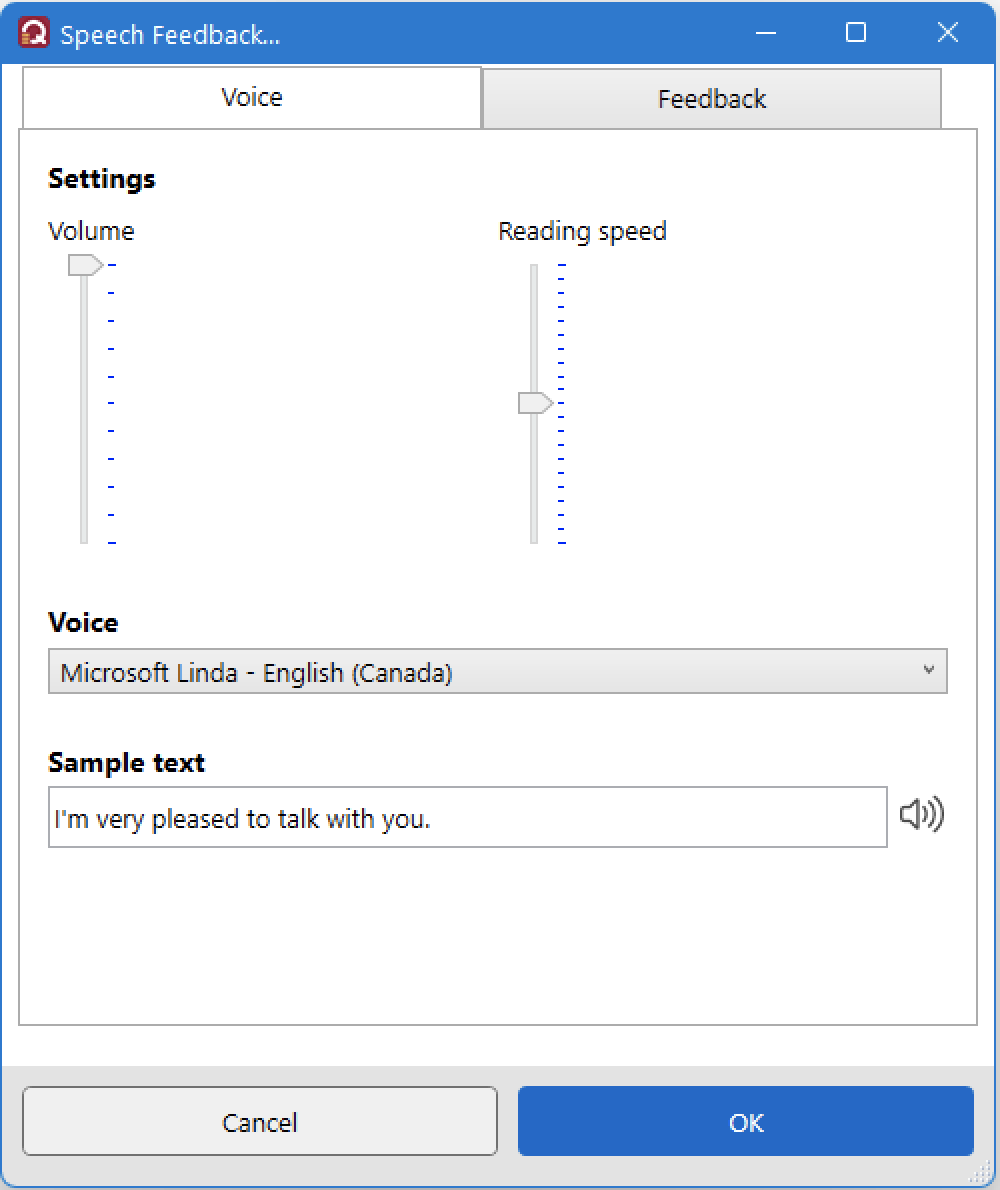
To adjust the voice:
Volume adjusts the speech volume. The maximum volume is the current Windows volume setting.
Reading Speed adjusts the reading speed of the selected voice.
To change the reading voice:
- Choose from the list of available voices.
- Click Try button to hear how the voice sounds with its selected settings.
Select Speech Feedback...>Feedback from the Options menu.
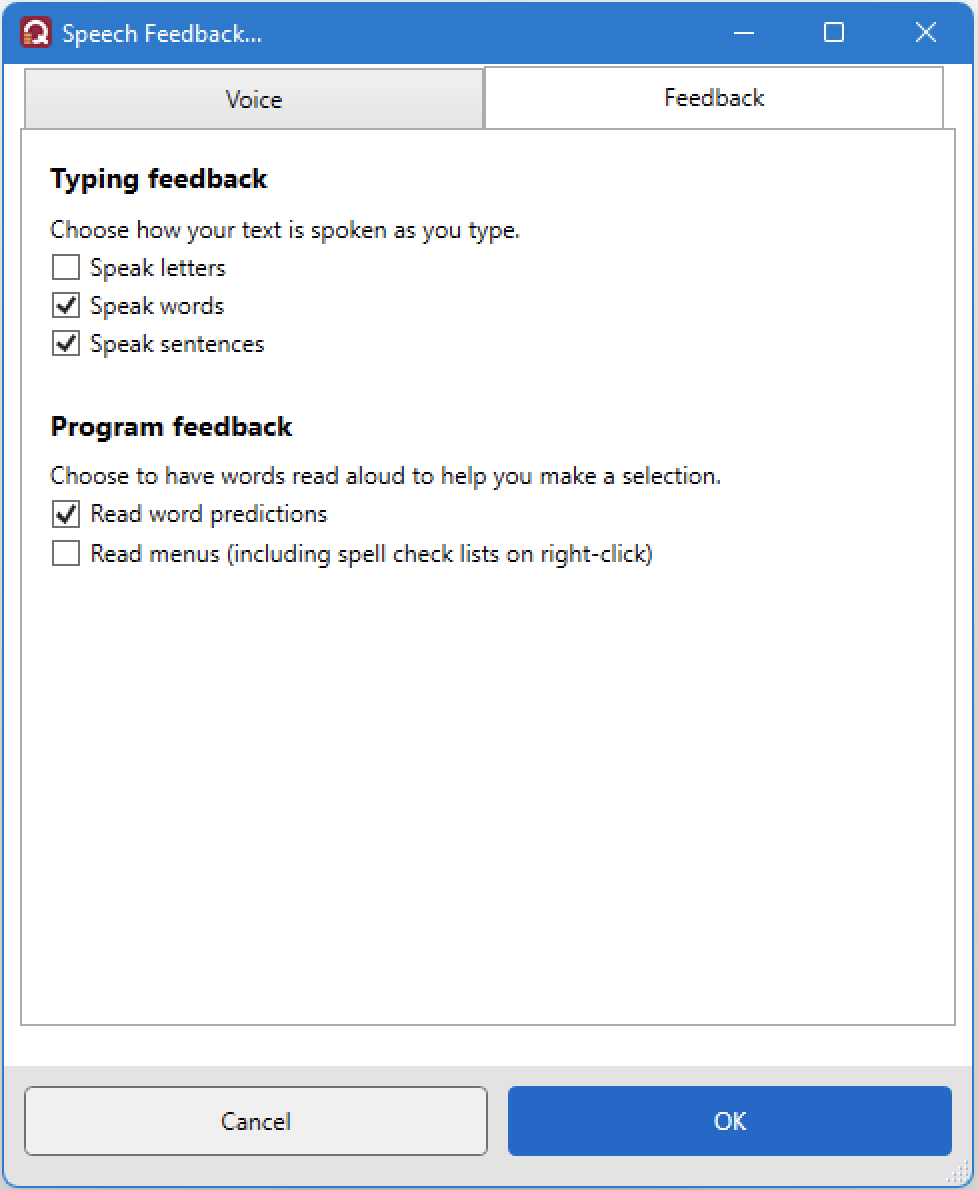
Typing feedback
Speak letters helps you confirm which character you have typed. Each letter is spoken as you type it.
Speak words helps you detect spelling errors. Each word that you type or select is spoken. (Default = ON)
Speak sentences helps you hear the word flow in a sentence to decide whether the proper words and punctuation have been used. (Default = ON)
Program feedback
Read word predictions lets you hear predicted words when you point to them. (Default = ON)
Read menus lets you hear application menus as well as right-click pop-up menus.
Select My Words...>Pronunciations from the Options menu.
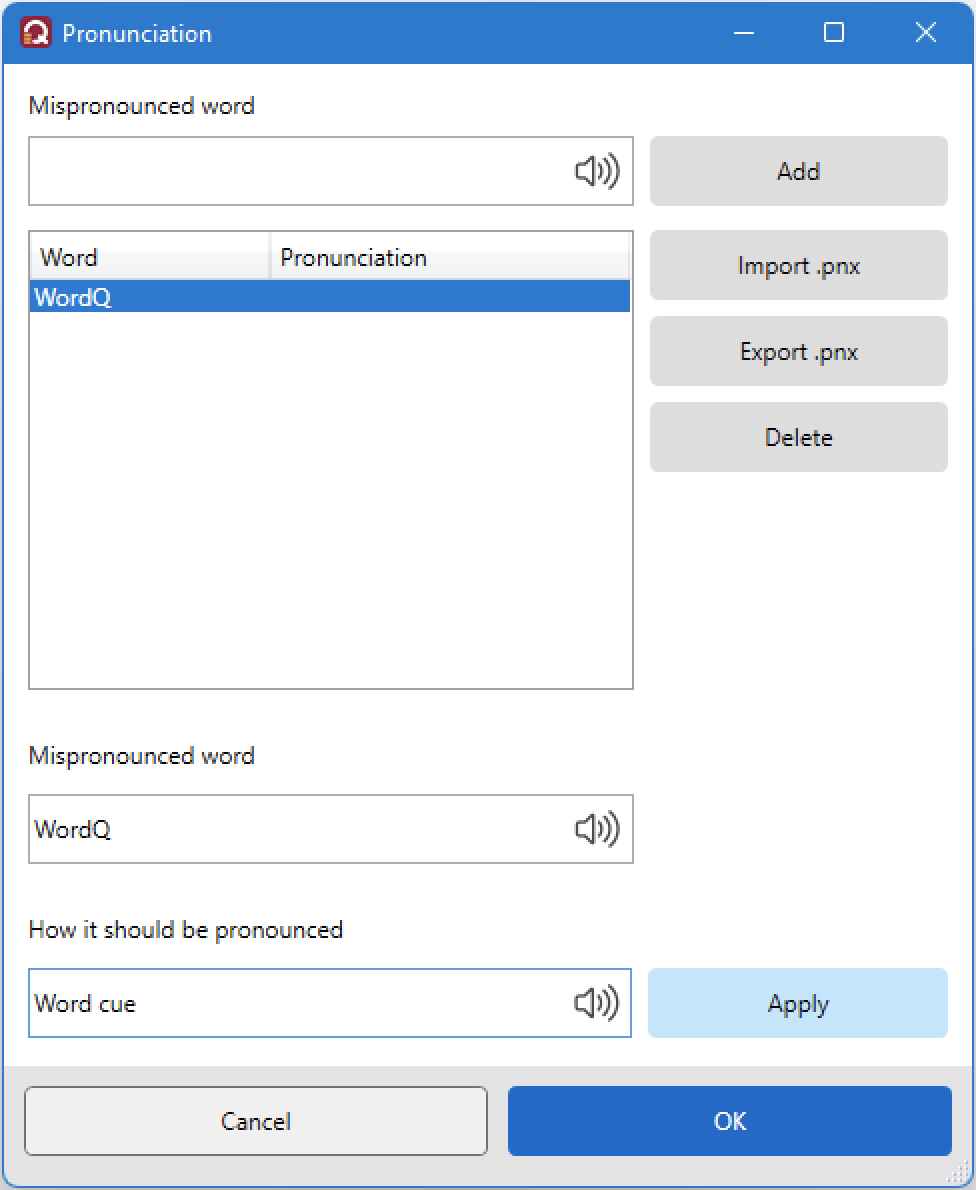
Change pronunciations of certain words (e.g., your name) if the current pronunciation is inaccurate by spelling out how you think it should be spoken.
To add a pronunciation exception:
- Type in a word in the Mispronounced word box using. Click the button to hear how it is spoken. Then click Add.
- The mispronounced word will be entered in the list below in alphabetical order.
- Type the alternate spelling in the How it should be pronounced box and click Apply.
- Repeat for all pronunciation exceptions.
- Click OK when done.
To share your pronunciation exceptions:
- Choose Export .pnx to export your pronunciation exceptions to share with another user.
- Choose Import .pnx to import pronunciation exceptions that has been saved using the Export .abb function (only).